EPSON ezCISS - Continuous Ink Supply System

Installation Instruction
READ ALL INSTRUCTION PRIOR TO INSTALLING YOUR NEW SYSTEM
PLEASE ENSURE THAT YOUR PRINT HEAD IS IN WORKING ORDER BEFORE INSTALLING CISS
 
I. Getting Started II. Nozzle Check III. Care Instructions IV. Waste Ink
 

Thank you for purchasing ezCISS. Printing has been a different experience ever since you installed ezCISS on your own printer. Just imagining being able to print without regards to the ink level in those expensive little cartridges.

Please take your time installing
ezCISS. Do NOT remove your old cartridge until ezCISS is ready to be installed (to prevent the drying of heads). In addition, make sure you are getting perfect nozzle checks before installing the ezCISS. The ezCISS won’t be able to work properly if the nozzles are previously clogged.

Most people get a perfect nozzle check the first time after installing the
ezCISS; others may need to run two or three cleaning cycles or let the printer sit for a while before they get the perfect results.


I. Getting Started

1. Check the printer head before beginning the installation.

  1. Open "Control Panel". Then click “Printers and Faxes”
     

  2. Click the right button of mouse on your printer. Then click the Properties and choose the “Nozzle Check” as the picture shown below.


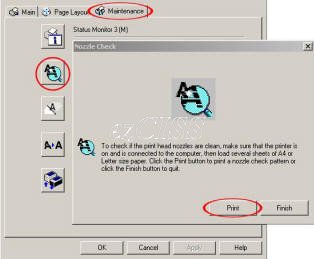
  3. Using the Utility, print a “ Nozzle Check” to make sure that all the nozzles are firing properly.
    IF your Nozzle Check is not perfect, Your PRINT HEAD could be damaged.


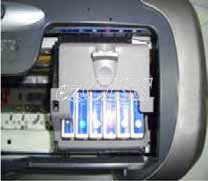
2. Press the ink button (Picture A) on the printer to move the cartridge to the change position (Picture B).

(Picture A) (Picture B)


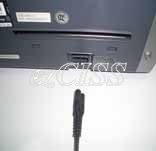
3. Unplug the power connector at the back of the printer (Picture C). This will prevent the printer from “auto powering down”, allowing you have as much time as you need to complete the installation. Remove the original cartridges from the cartridge carrier as (Picture D) shown.

(Picture C) (Picture D)


4. Place Ink horizontally until the large portion is completely fill the with ink.  In upright position, ink levels should be as below.


5. Plug out the cap of the ventilation hole as shown (Picture F).  Insert the Air filter into the ventilation hole to let air in when the printer is working, while keeping dust out of the bottles (Picture G).

(Picture F) (Picture G)


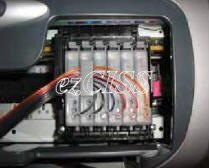
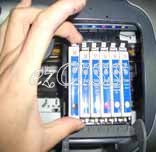
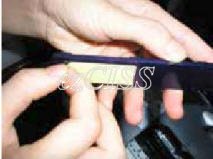
6. Insert the cartridge into the cartridge carrier.  Make sure the cartridge is down all the way and they are making contact with the fingers that read chips. (Picture H)

(Picture H)    


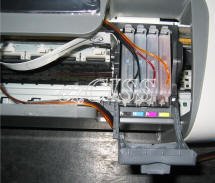
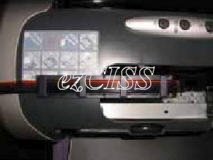
7. Put the tubes in the flute of the support arm (Picture I) and attach the support arm on the printer (Picture J & K)

(Picture I) (Picture J) (Picture K)


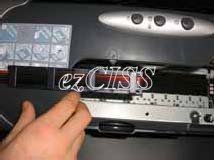
8. IF you do not wish to use the support arm, you can use "scotch tape/double sided tape" to tape the ink tube to the inside of the printer (As below).  This allows you close the printer cover completely (looks nicer too)


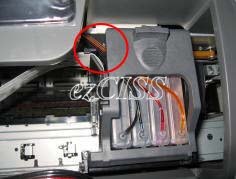
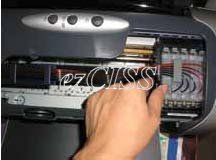
9. Slide the cartridge back and forth from left (Picture L) to right (Picture M) several times; make sure the tubes not too tight when cartridge is in the far right and left position (! IMPORTANT !)

(Picture L) (Picture M)


Now that everything is put together! Double check your cartridge; then turn on the power. Watch for anything unusual. You are ready to start printing.


II. Nozzle Check

1. Turn on the power and clean the printer head for two or three times.

2. Print the “Nozzle Check” paper and if the print effect shown as the following picture, you can start printing.


III. Care Instructions

  1. Please do not take out cartridge at random after installing the CIS system. Keep the reservoir bottles on the same level with the printer.
     

  2. Try to keep at least 1/2 inch of ink in the bottles, as you don’t want to run out of ink and draw air into the cartridge.
     

  3. Don’t place the Reservoir Bottles higher or lower than the printer.
     

  4. To be used in a dry place between 15 and 35 degrees. Avoid exposure to direct sunlight.
    Common to ALL ink products (original or compatible). In general, when printer is left in an hot environment, ink in the print head will dry up and clog the printer head.  This is NOT due to CISS but lack of proper care by user.

    Epson CISS Auto Reset Chip (ARC)  will NOT clean the print head every time you on the printer (saves your ink).  It is only proper maintenance that user manually clean the print head once a while to avoid clogging or ink drying.


  5. Please make sure all the "Ink Filling Holes" and "Ventilation Holes" are closed tightly during the transportation. Otherwise, the ink will leak out.  Also close "Ventilation Holes" when Printer is not in use, this keeps the ink fresh.
     

  6. Do not sway the cartridge frequently. It may cause ink leakage.
     

  7. Do not pull out the connector of cartridge.
     

  8. Warning:
    1. Ink is NOT drinkable; keep it out of reach from children.
    2. Avoid exposure to direct sunshine and don’t keep it in high or freezing temperature.
    3. Avoid collision and dropping.


© Copyright 2005 - 2009  ezCISS http://www.ezCISS.com/


  © Copyright 2005 - 2009  ezCISS  All Rights Reserved. email / MSN -> ezciss@gmail.com